

Background Information on LiveRamp & Data Matching
LiveRamp is a data onboarding and identity provider where you can upload and store your CRM data (including emails, physical addresses, and other PII identifiers), where it gets matched to LiveRamp’s RampIDs, an online identifier informed by LiveRamp’s identity graph. You can learn more about LiveRamp’s data-matching processes here.
Once your data is uploaded and matched inside LiveRamp, LiveRamp’s Connect product allows you to seamlessly distribute your data to online monetization partners (such as Commerce Grid). During the process, LiveRamp’s RampID will be matched to IDs that Commerce Grid recognizes, such as cookies, mobile device IDs, and custom IDs.
Your customer service team at LiveRamp is best suited to assist you with any data matching or technical troubleshooting questions inside the Connect platform.
Distributing Data from LiveRamp Connect to Commerce Grid
Once you’ve setup your data in LiveRamp and are ready to distribute to Commerce Grid, navigate to the Connect platform to begin the process.
Step 1
To start, set up IPONWEB as a data destination. To do this, navigate to the Connect navigation menu, and click New Destination Account. Follow these instructions for how to add IPONWEB.
Step 2
Once IPONWEB has been setup as a data destination, continue with the below steps.

Step 3
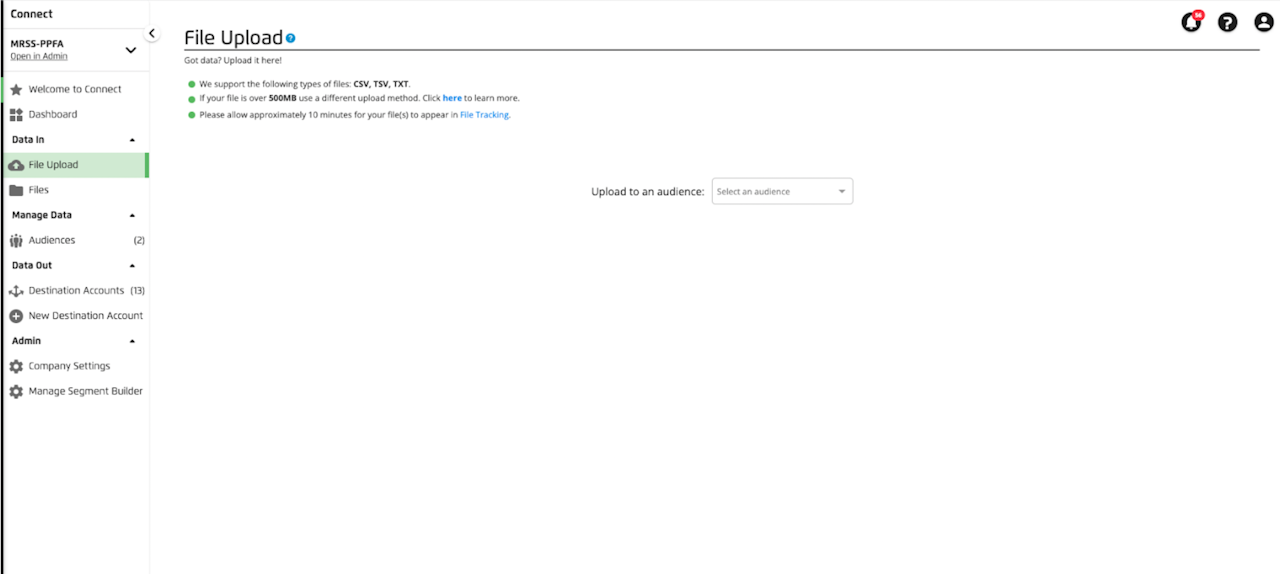
Navigate to “file upload” in the Connect UI. Select the CRM files you wish to upload.

Step 4
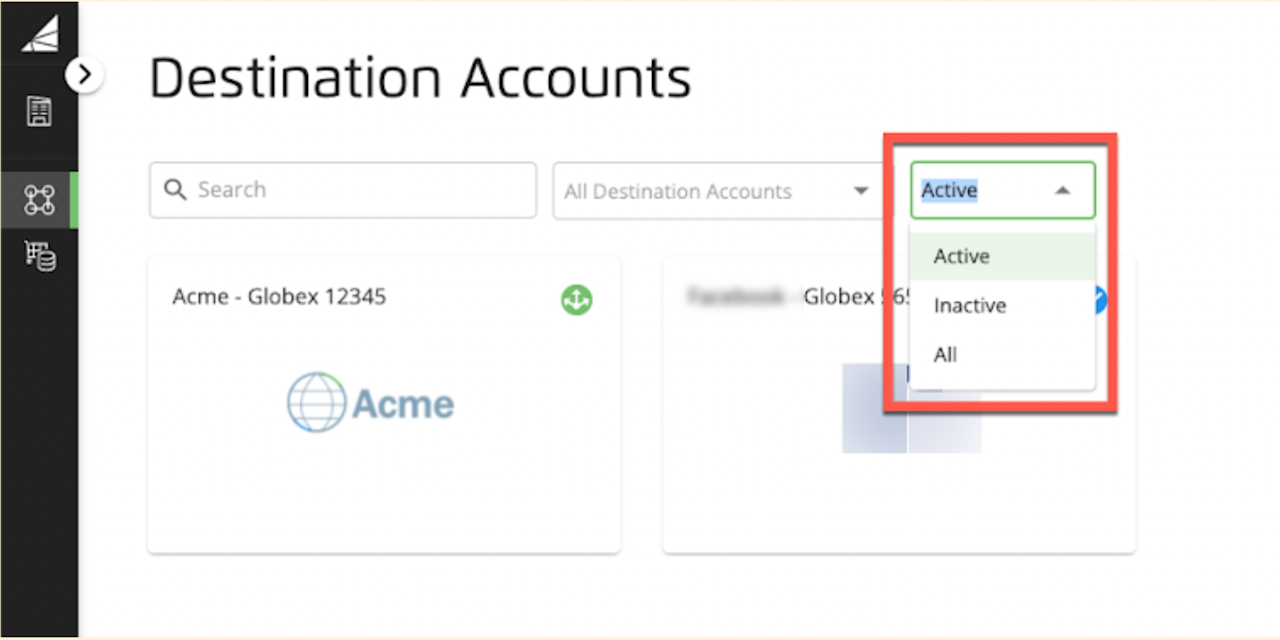
Once that file has been uploaded to the IPONWEB destination, you will navigate to the Destination accounts to find the IPONWEB tile and ensure it is active.

Step 5
Within the UI, you will notice two "IPONWEB" options. Please select "IPONWEB Onboarding" as shown below:

Step 7
Once you've selected this tile, there is a field called "Destination-Specific Settings" with a section for Client Name. Within this field, please input information as follows: [Publisher seat ID]_[publisher seat Name]_[Data Segment Name], (or however you prefer to name the data segment).

Step 8
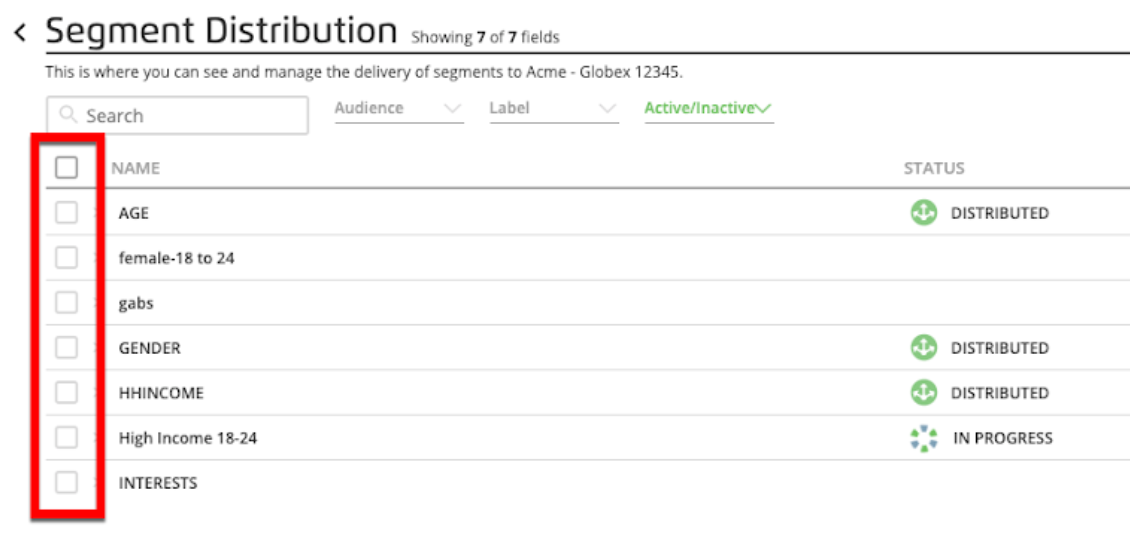
Once you activate, click the Segment Distribution page for that account. Select the segments to distribute to this destination by checking the checkboxes left of the segment name. You can check off the segment(s) and add it to distribution within the IPONWEB tile.

Step 9
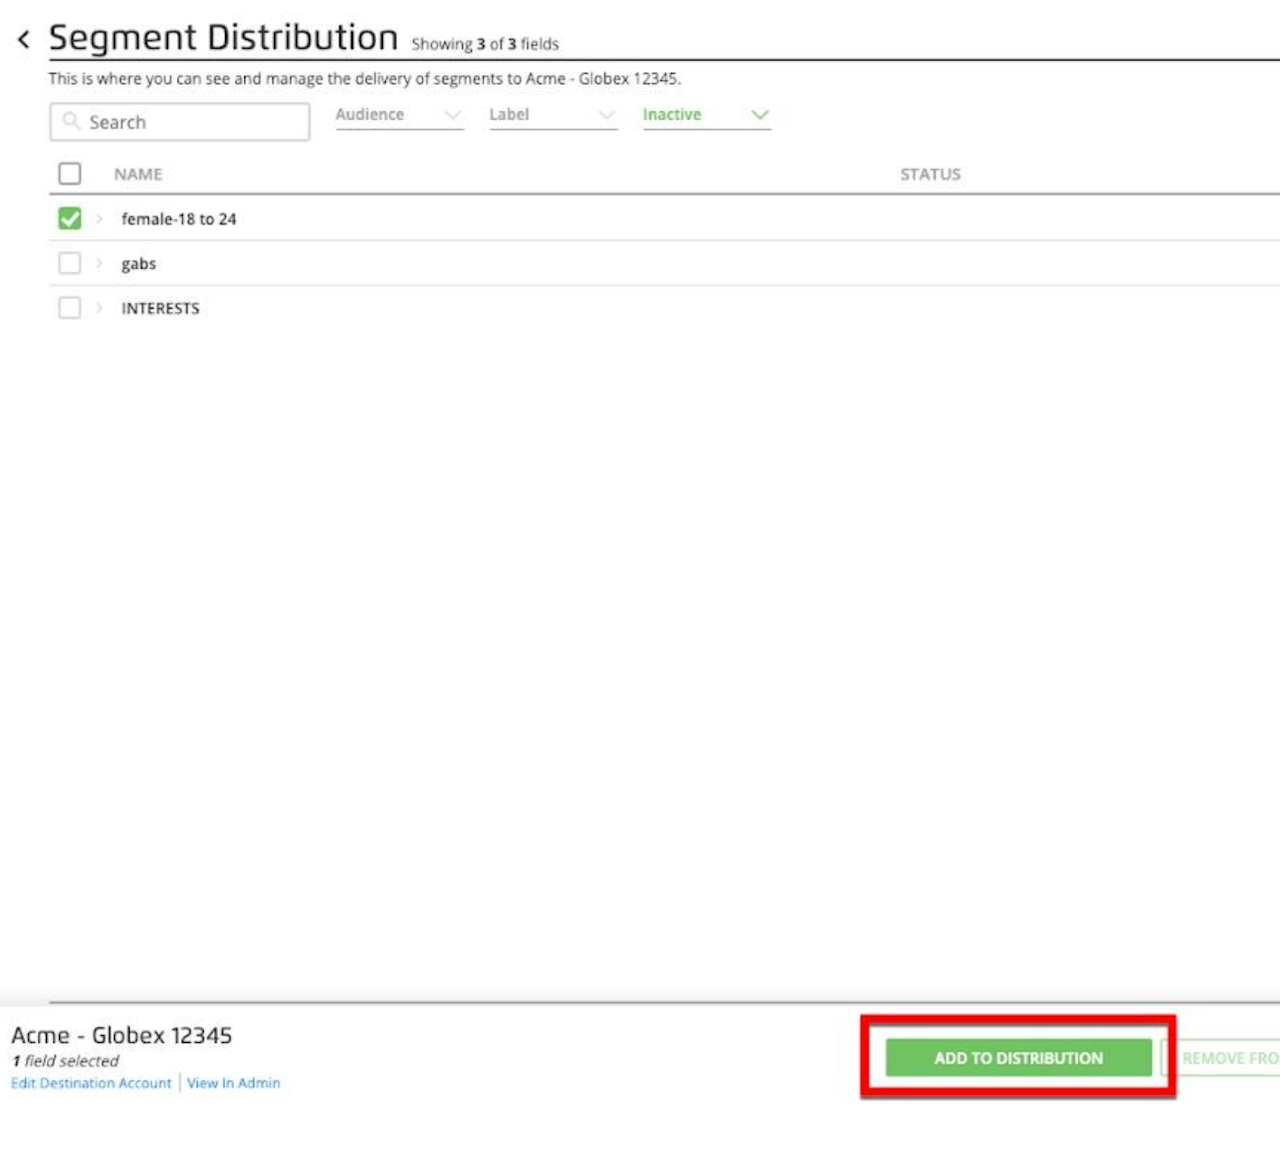
Click Add to Distribution to start the distribution of your selected segments.
Step 10
Email integrations@themediagrid.com with the segment & our integrations team will confirm once the segment is available in the UI (turnaround time is typically 48-72 hours).
